April 2nd 2014
March 26th 2014
March 20th 2014
March 10th 2014
Feb 15th 2014
Resize an Existing Partition
With Microsoft's Disk Management Tool.
The introduction of the resize feature in recent versions means we can safely
release disk space for new partitions by non-destructively shrinking an existing partition.
 Do You Know Enough? There are situations where resizing a partition may not be useful or desirable. The classic MBR partitioning scheme has a limit of only 4 primary partitions, so making space for a fifth primary would be pointless. Please make sure you at least know the basics before you begin.
 Know your Alignments. The later versions of Disk Management will make and resize partitions to the new 4K alignments, so resizing a classically aligned partition will result in one that starts with the old rules but ends on the new. This in itself may not cause any issues, but using an opposite standard of tool from existing partitions should still be avoided.![]() Working With the New Partition Alignments
Working With the New Partition Alignments
RAW and Dynamic.
Only NTFS or RAW partitions can be resized but be aware that RAW and unformatted partitions can contain such things as database files and shrinking them can be data destructive. Likewise Dynamic Disks and their partitions can be damaged by resizing and is outwith the scope of this guide. Please refer to Disk Management's own Help file if you want to adjust dynamic volumes. ![]() Don't be Dynamic
Don't be Dynamic
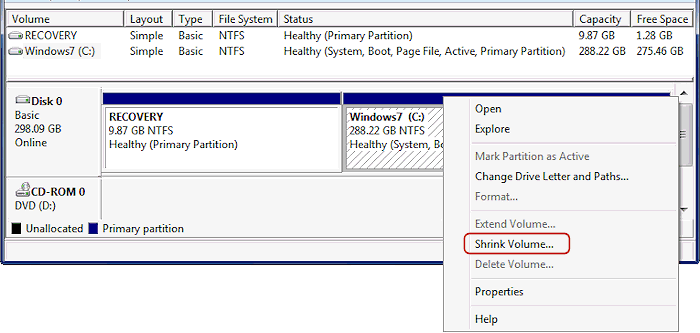
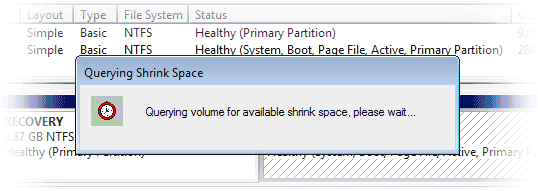
Shrinking a Partition
For a primer and details on how to start the Disk Management tool please refer to the first article in this series.

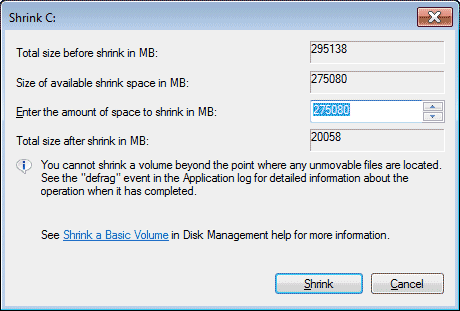
The Windows-7 operating system in our example here is very lean and only occupies 13gigs of the partition and so we could if we wanted shrink things down to the 20gigs we have been offered. The possible size we can shrink down to will be dictated by among other things the overall amount of data that is on the partition, but it can also be affected by where that data is. If for example we had some immovable file like the swap file right in the middle of our partition then the available shrink space we will be offered will not go past that. In our example that would mean we could only resize the Windows partition down to a minimum of about 145gigs. If you encounter this problem there are some steps you can take.... Three - Outside - Links.
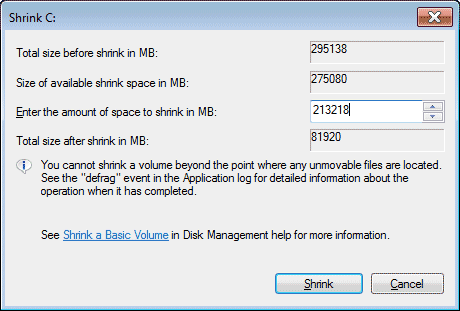
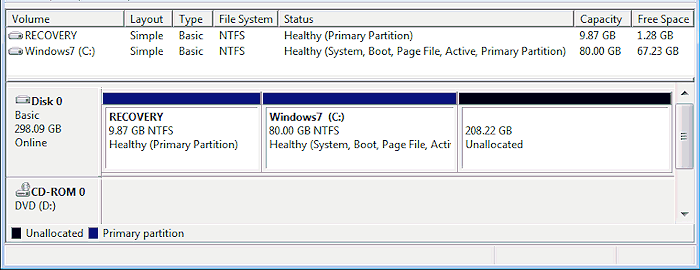
The resize operation may take only seconds or depending on how much data there is to be defragged and moved into the new space it may take a while. Our example here now has 208gigs of free space that we can partition up and use for other operating systems and/or a data partition, or for clones of the current Windows-7 install.
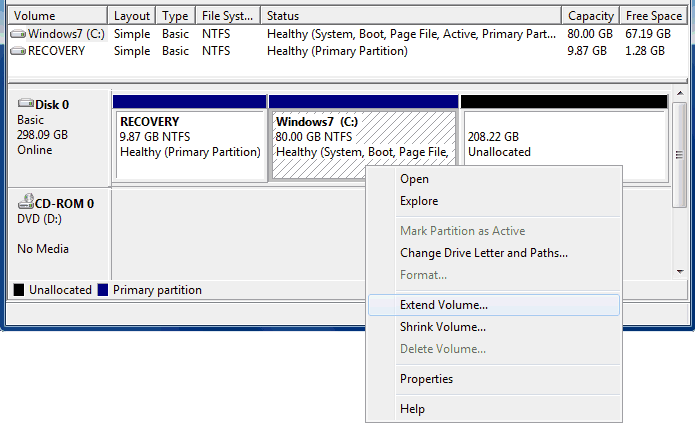
Extending a Partition
To extend an existing partition it is necessary to have unallocated or free space immediately after it on the drive to expand into. Windows Disk Management can only move the ending point of a partition towards the end of the drive, you can’t extend from the start of a partition towards the front of a drive.
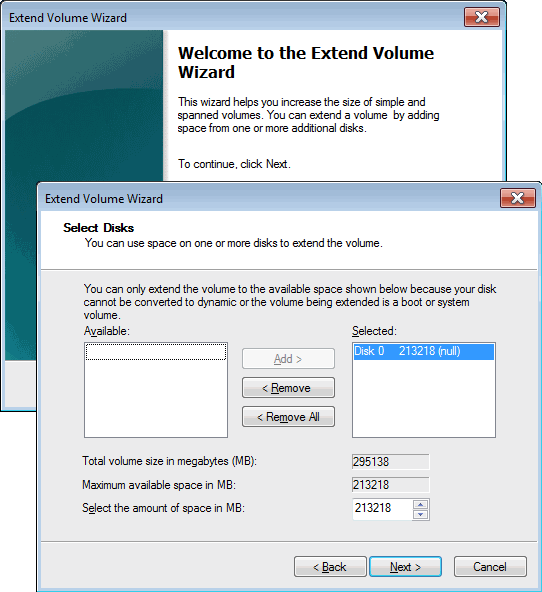
The hard drive of the partition you selected will be listed in the right hand window and in the majority of cases the left hand window will be empty (fig:8). If however you have other hard drives in the machine and you also have the correct circumstances then you may be given the option to merge free space from other hard drives to the partition you have chosen to expand. If you do have other drives showing in the left hand Available window (Hover Here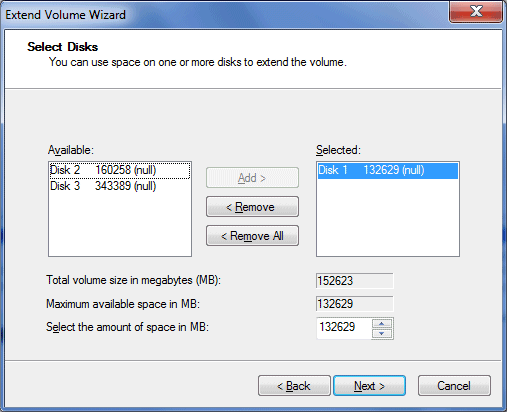 ) you will have the option of adding them to the Selected window. Please be acutely aware that this is a highly undesirable thing to do unless you are an expert on Dynamic Disks and understand the consequences of this action. For most of us the Next button might just as well read 'Destroy all Data on Selected Disks' because those disks will be converted to be Dynamic, which will be beyond most peoples' ability to reverse without wiping the drive/s and starting over.
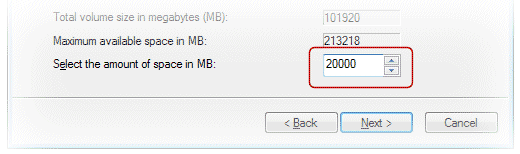
So make sure that only the hard drive of the partition you want to extend is listed in the Selected window and then you can focus on the only option here that concerns us. The bottom white numbers box will show all of our available free space, but if you don't want to use all of it then change the number to the amount of MB you want to add to your selected partition (fig:9). We are wanting to increase our 80gig partition to 100gigs, so we enter 20,000 in the box
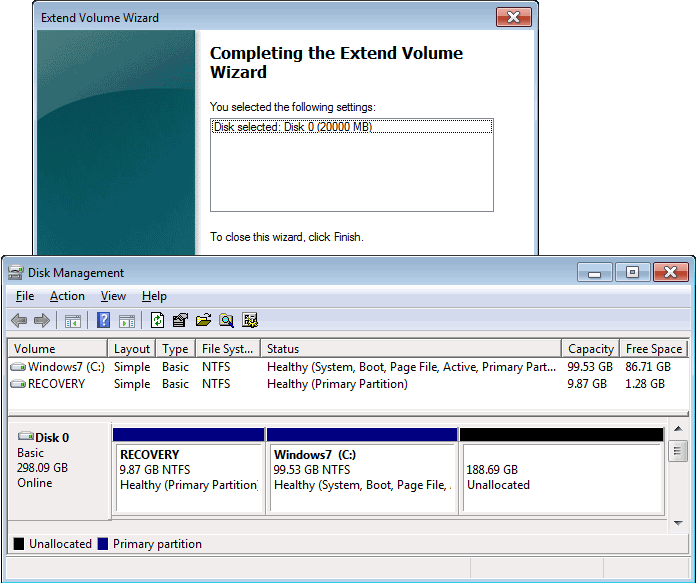
The finished result is that our Windows-7 partition has increased by the 20,000MB to make it around the 100gigs mark. If we had entered 20,480 it might show in Disk Management as exactly 100.00 GB, but these nice round gig numbers often don't show in Windows itself, so chasing them in Disk Management can be futile.
To remove the recovery partition for example from our drive shown above and then move the Windows partition to the beginning of the disk, the first thing we would do no matter which way we planned to proceed would be to make our back-up of the Windows partition. We would make at least two back-ups by cloning the entire partition into the unallocated space we have created and also to another internal or external hard drive. Once we have tested that the new clones were bootable and usable we would delete the recovery partition and the original Windows partition and then clone Windows back to the position we wanted at the start of the drive.
Is this the future of all tablets - or just a temporary aberration?

All product and company logos, icons and images that are reproduced on this site are the property and trademarks of their respective owners and are used here merely to illustrate their products, NOT to indicate or infer any endorsement or partnership unless otherwise stated. We have endeavored not to reproduce copyrighted images or graphics or infringe upon the rights of any trademark or copyright holder. If you believe or suspect we may have breached the permissible use of copyrighted material then please bring it to our attention. The reproducing or copying of original material from this site is currently allowed for non commercial purposes with the provision that your source is clearly indicated and that a back-link to the referenced information is included. Thank You. See our full Terms of Use. Material on this site is not guaranteed to be free of errors. Multibooters.com 2012 - 2013