About Contribute Disclaimer Contact News
Disclaimer
The information on this site is offered in good faith and no responsibility can be accepted for misuse that leads to loss of data or damaged hardware.
Help Us Improve
Have you spotted an error, or found something confusing or ambiguous? Help us improve our articles......


Google Advert Links
-
-
spacer Multibooters.com

flash drive win8

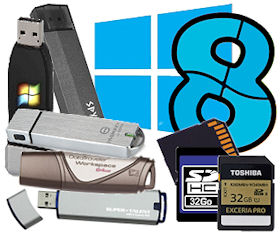
Run Any Version of Windows-8 from a USB/SD Flash Device.


Windows only natively supports installing the Enterprise Edition of Win-8 to USB devices, which is easy to do with the Windows To Go Creator Wizard from inside a Win-8 Enterprise install, or with some command line tech-work from any version of Windows-8.
info iconTechNet - Windows-To-Go Step by Step.

We can however with a little workaround get any version of Windows-8 to boot and run from a USB/SD flash device. It requires that we first install Windows-8 in a particular way to a standard SATA hard drive, then we just have to clone that to our USB/SD flash device.

First Move.
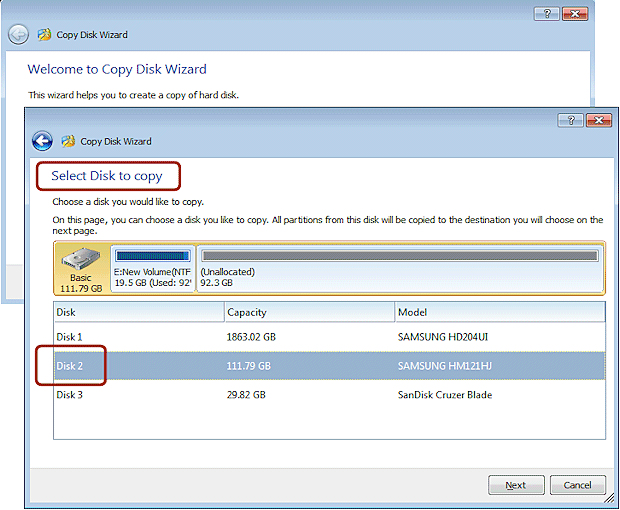
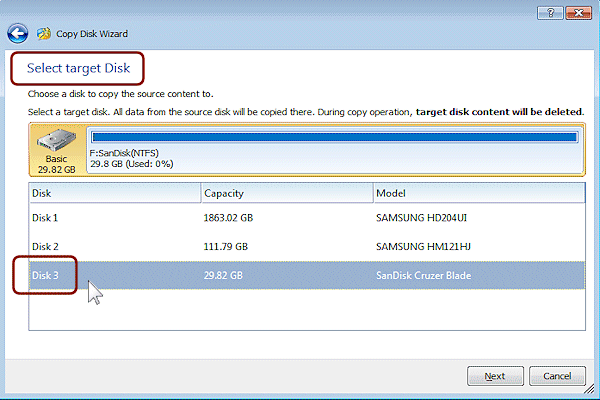
The tutorial on this page totally depends on possessing a correctly configured hard drive that we will use to create our Win-8 bootable USB/SD flash device, so if you do not already have that to hand then you need to start with this page. The other items required are of course a suitable USB/SD stick or card, plus a cloning tool that can correctly do what's needed. If you want a decent performing system then you will need to use a good quality device that has decent read/write speeds. Our recommend tool for the cloning operation is Partition Wizard, which is currently free for home use.

A Few Provisions.
While we have shown that it is possible to get any version of Win-8/8.1 booting from a USB/SD stick or card, we cannot testify to how viable it may be in the long term. It has merely been a proof of concept project for us and although we can foresee no issues with activating Windows and applying updates, we have not yet seriously explored this. For anything more than just the testing of Win-8, or the occasional use for access, or diagnostics, or the running of an app, then please refer to the further information boxes below to understand some of the factors that will affect usability.


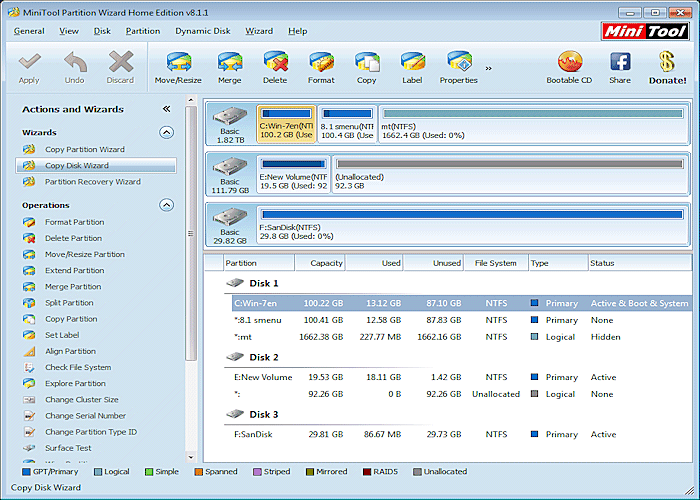
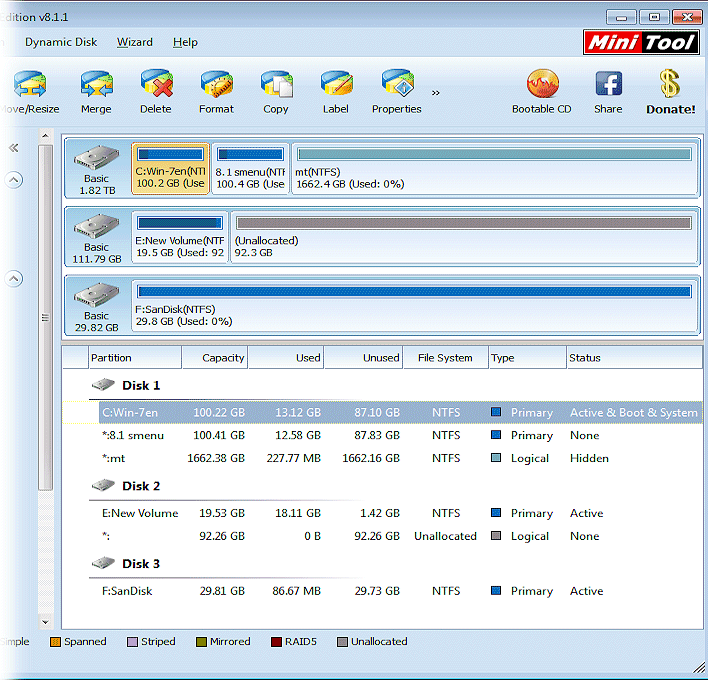
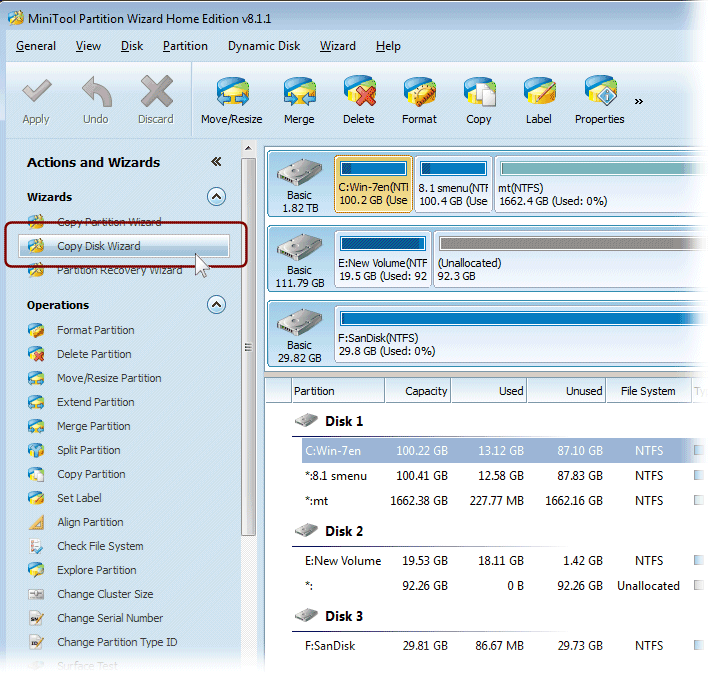
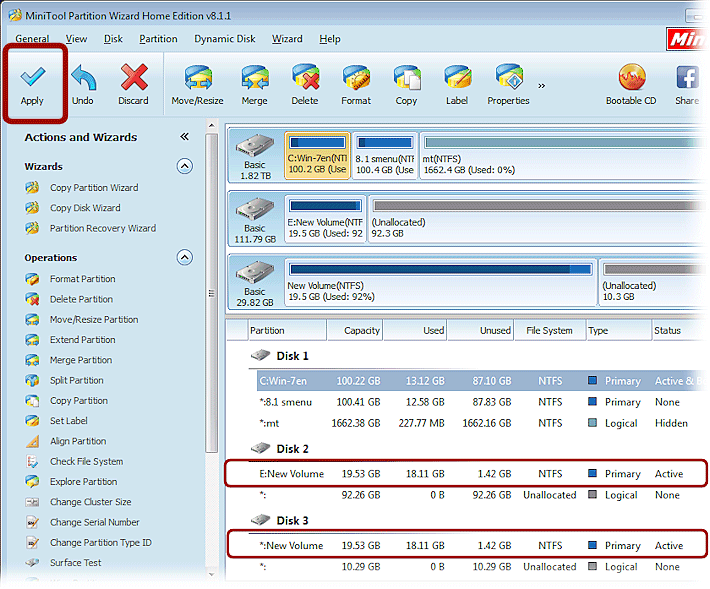
Once you have all the required components ready then fire up Partition Wizard. In our example in fig:1 we are running it from Windows 7 on the machine we are using. You could however run it from a bootdisk if that was more convenient or if your circumstances require it, (links and details for the bootdisk version here).

Fig:1
Partition Wizard screenshot
The main Partition Wizard interface you should see when it starts up.


Fig:2
Partition Wizard screenshot
We have 3 drives showing, which are from top to bottom, the internal hard drive of the build machine, the hard drive we prepared with a custom install of the Windows-8.1 operating system, then the 32gig USB key that we are going to transfer Windows to. In our example the second hard drive is connected inside the build machine by a normal SATA channel, but it could be connected by USB provided there are enough available ports. Note that disks are numbered from 1, where as Disk Management and many other tools start numbering from 0 (zero).


Fig:3
Partition Wizard screenshot
We do not have to do any preparation work on the USB key because no matter what is on it or how it is configured the copy process should overwrite everything. So go ahead and select the option Copy Disk Wizard.


Fig:4
Partition Wizard screenshot
The first Welcome to Copy Disk Wizard box just needs clicking past to get to the Select Disk To Copy options box. We want to copy our specially prepared physical hard drive, which in our example is Disk 2, so we highlight it and click Next.


Fig:5
Partition Wizard screenshot
In the Select Target Disk box our USB key is Disk 3 so we highlight it and click Next.


Fig:6
Partition Wizard screenshot
There will be another chance to review and check your selections, so it's safe to click thru this warning.


Fig:7
Partition Wizard screenshot
You will be selecting option 1 or 2 here depending on if you want to use all available space for the main partition, or if you want to have another partition for perhaps just data or even a second operating system. It could also depend on whether your flash device is seen as removable or fixed...see below. It is not crucial what you choose to do now as Partition Wizard can be used at any time to expand or shrink these partitions. The last option shown here to align partitions won't be required if you have followed our instructions on configuring the Win-8 hard drive.


Fig:8
Partition Wizard screenshot
This booting suggestion is more for when cloning to another hard drive. For a USB/SD device it is preferable to try and use a bios boot menu...see Booting From USB/SD.


Fig:9
Partition Wizard screenshot
Before you click the Apply button you can see exactly what the result of your chosen operations will be. Check that the flash device is indeed going to be getting a copy of the partition from the donor hard drive. In our example here that is the partition called New Volume which is NTFS, Primary and Active. Because we selected the option to Copy partitions without resize the capacity and data figures for the partitions are identical, but they would of course be different with other options. Any unallocated space remaining on the USB/SD device will likely be a lot less than on the hard drive.


Fig:10
Partition Wizard screenshot

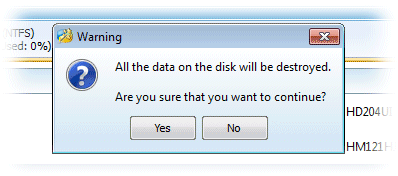
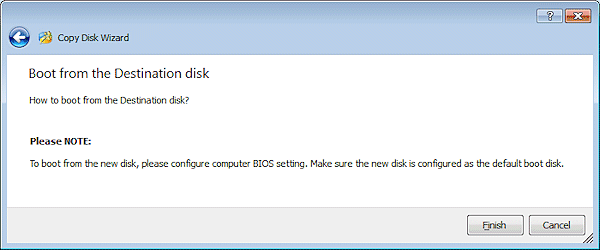
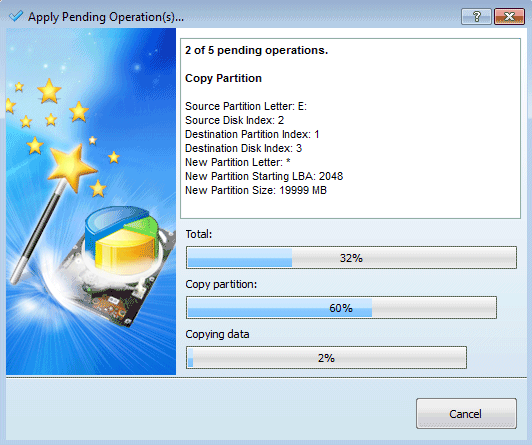
This is the final button you will have to click to start the cloning operation. Depending on the write speed of your flash device that could take up to an hour, so the advice given here may be pertinent, but not crucial in this situation because if the write fails you can simply try again.

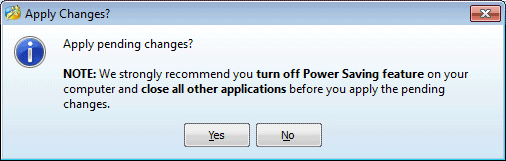
If you are not immediately taken to the progress box shown next in fig:11 but instead get a message that Partition Wizard needs to reboot to complete the operations, then it should be safe to allow this, but we would prefer to cancel out of everything and use the Windows Disk Management Utility to remove drive letters from both the donor and target devices, then start over.


Fig:11
Partition Wizard screenshot
When operations are complete and this box closes then you are done. If all is correct then your Win-8 USB/SD flash device is ready to use and should require no other steps for it to be bootable.

A short video showing the Disk Copy Wizard being used can be video play button seen here.


image USB keys

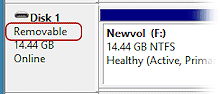
Removable or Fixed drive.


Until recently all USB keys and SD cards would report themselves to be removable devices, which for Windows means they won't be considered partitionable, with the result that only one partition will be recognized and assigned a drive letter. What's more, even the Windows Disk Management utility will only allow limited operations on this partition and give no provision for making or manipulating other partitions on any devices that are waving a 'removable' flag.
The USB keys that Microsoft are recommending for Windows-To-Go are different in that they do not report they are removable, hence Windows will see them as USB hard drives, with the consequence that all partitions on such USB flash devices can be given drive letters to make them visible and accessible to Windows.

Our method detailed on this page for running Win-8 from a USB/SD flash device will work whether the device reports itself as removable or fixed, but there are a few limitations you need to be aware of if you are going to be using a removable device. First up is of course that Windows won't be able to see or make use of other partitions on the device, so no point for example in creating an extra data partition that you may want to access from Windows. The second is that Windows will not allow a paging file on a removable device, so your flash running Win-8 will either have to live without a paging file, or be allowed to utilize a hard drive in the machine in use. In the absence of a suitable location for the paging file a dialog box will be displayed on the desktop at each bootup from where you can access, to no avail, Virtual Memory settings. There may be other unforeseen issues when using a device marked as removable, so we cannot guarantee any serious or long term use of Windows-8 in these circumstances.


image USB keys

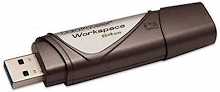
Recommended USB keys for Windows-To-Go.


Microsoft have a list of USB devices that are certified for Win-To-Go, all of which in addition to being a bit pricey are USB-3, at least 32gigs in size, have good read/write speeds, plus have the 'removable' flag lowered so they appear to Windows as fixed drives. For our Win-8 project on this page we recommend the same specifications if you want a reliable device with acceptable performance.
We have however experimented with lesser devices and can say that it will all still work on an average SD card or USB-2 stick even when they are seen as removable. We have also managed to squeeze it all onto a 16gig USB key, by making the physical partition on the donor SATA hard drive 14gig and the VHD 10gig. Performance did of course suffer in some cases but we managed to improve things a little by turning off some unessential Windows features and visual effects. You should be aware that the disk copying process in particular will put demands on lower quality flash devices and we did personally have a cheap USB key get smelly hot and curl up and die on us about half way through the copy process. We informed you thusly.
You may be able to find some less pricey USB keys that have had their removable tags turned off. SanDisk it seems started to quietly ship many of their USB keys to appear as fixed drives so that they would be Win-To-Go compatible, but after numerous reports that these USB keys were not being accepted by some applications that expect flash drives to be listed as removable devices, they reverted to the old standard. If you know or figure out how to identify which keys are which before buying, then please let us know. - feedback.


Spanner iconTech Bench Extra tech stuff for those that want to understand.
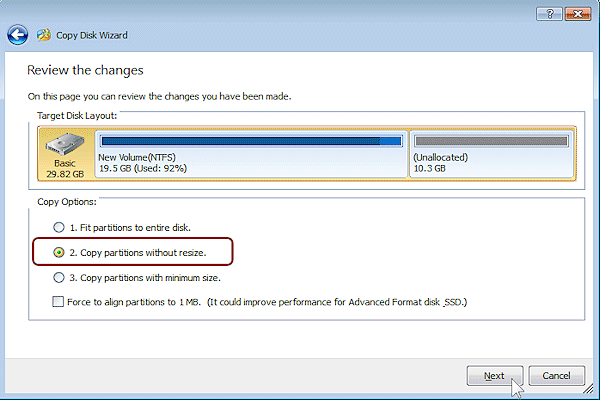
How Partition Wizard Works:  When Partition Wizard is copying our hard drive to the flash drive it pretty much does a full sector by sector clone, except that at the end it will change the disk signature on the target drive so there can never be any signature collision issues from two connected drives having the same disk signature. Of course Windows uses the disk signature in the boot process, so Partition Wizard will then also update the relevant Windows boot file (the BCD) so that it knows of the disk signature change.

If you want to use another disk cloning tool then it can either operate the same as Partition Wizard, or just do the true sector-by-sector copy as long as you aware of possible signature collision issues. Boot problems can also result from the Windows partition not being aligned correctly to match the alignment it had on the parent hard drive, so your cloning tool also needs to faithfully duplicate partition offsets, unless of course you are adept at editing the BCD store to correct for boot problems caused by things like changed partition offsets, or disk signatures.


multibooters logo multibooters.com
creative commons licence

All product and company logos, icons and images that are reproduced on this site are the property and trademarks of their respective owners and are used here merely to illustrate their products, NOT to indicate or infer any endorsement or partnership unless otherwise stated. We have endeavored not to reproduce copyrighted images or graphics or infringe upon the rights of any trademark or copyright holder. If you believe or suspect we may have breached the permissible use of copyrighted material then please bring it to our attention. The reproducing or copying of original material from this site is currently allowed for non commercial purposes with the provision that your source is clearly indicated and that a back-link to the referenced information is included. Thank You. See our full  Terms of Use.  Material on this site is not guaranteed to be free of errors.   Multibooters.com   2012 - 2013

Home Sitemap Privacy-Policy About Contact/Feedback Donate Copyright/Legal